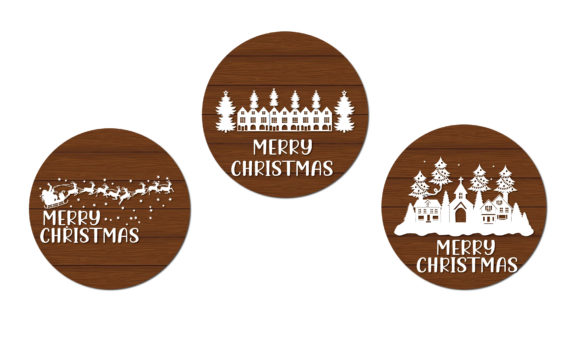
3D Merry Christmas Craft Papercut: How to Avoid Common Pitfalls and Create Stunning Layered Decor
You may have seen them while scrolling through holiday craft inspiration: intricate, layered papercut scenes that seem to jump off the wall or stand elegantly on a shelf. Trees with depth, stars that cast tiny shadows, and snow-covered villages that look almost real. This is the appeal of the 3D Merry Christmas Craft Papercut—a style of papercraft that uses multiple cut layers, often mounted with spacers, to create a dimensional scene. While the results can be breathtaking, many crafters, from beginners to seasoned makers, run into frustrating issues that turn a promising project into a pile of torn paper and wasted hours. Let’s walk through the most common mistakes and how to sidestep them, so you can produce a finished piece you’re proud to gift, display, or even sell.
Before we dive into corrections, it helps to understand what a 3D papercut actually involves. Unlike a flat silhouette, this craft uses several sheets of paper—each cut with a specific portion of the design—that are stacked with foam tape or similar spacers. When placed in a shadow box or frame, the layers create a sense of depth and shadow. The design might be a Christmas tree with ornaments receding into the background, a Nativity scene, or a winter forest. Templates are often sold as SVG or PDF files for cutting by hand or with a machine. The magic lies in the precise alignment and thoughtful stacking.
Choosing a Design That’s Too Complex for Your Skill Level
A stunning twelve-layer snowflake with tiny cutouts might look amazing on a designer’s website, but if you are new to the craft, you are setting yourself up for frustration. Beginners often underestimate the patience required for intricate cuts, especially when working with fine details that tear easily. This mistake leads to broken pieces, misaligned layers, and a finished product that looks messy rather than magical.
Better approach: Start with a three- to five-layer design that uses bold shapes and generous spacing. Look for templates labeled “beginner” or “simple.” As you gain confidence, you can gradually move to more complex scenes. Remember: even a simple design with crisp cuts and good depth can be stunning. Quality of execution matters far more than number of layers.
Using the Wrong Paper Weight
One of the most overlooked details is paper selection. Many people grab standard printer paper, which is around 80gsm, because that’s what they have on hand. This weight is too flimsy for a 3D structure. It droops, tears at the slightest pressure, and does not hold the spacer’s thickness well. The result: sagging layers, visible curling, and a piece that looks amateurish.
What to use instead: Cardstock between 200 and 250gsm is usually ideal. It is stiff enough to hold its shape, yet not so thick that it’s hard to cut. For designs with very fine details, 160–200gsm can work, but avoid going below that. If you plan to backlight your piece (placing it in a frame with lights), lighter paper may create a nice glow, but it still needs enough rigidity. Test a scrap piece first.
Ignoring the Cutting Order
Even when you have the right paper and a beautiful template, how you cut matters. Many beginners print all layers at once and cut them out of order, not realizing that small adjustments to blade depth, pressure, or speed affect each layer differently. This can cause misalignment when stacking, because one layer might be slightly larger or smaller than intended if the cutting settings were not consistent.
Practical fix: Always cut the base layer first (the backmost layer) and check that it fits your frame or box. Then cut subsequent layers, verifying that each aligns with the one below. If using a cutting machine (Cricut or Silhouette), use a test cut on the specific paper you plan to use. Different brands and finishes require tweaks. Keep a log of your settings for future projects.
Inadequate or Excessive Spacing
The depth of your 3D effect depends on the thickness of spacers you use between layers. Common mistakes: using foam tape that is too thin (no visible depth) or too thick (layers look disconnected and shadows become harsh). Also, some crafters apply spacers randomly, causing some layers to tilt or sag over time.
How to get it right: Foam tape comes in various thicknesses, typically 1mm, 2mm, and 3mm. For small shadow boxes (under 2 inches deep), 1–2mm spacers work well. For larger displays, 3mm or combinations can be used. Place spacers near the edges and at key supporting points of each layer—not just in the center. This stops the paper from bending. If your template includes suggested spacer placements, follow them. If not, add extra support at corners and along long thin sections.
Overlooking the Importance of Lighting and Display
A 3D papercut is not finished until it is properly displayed. One common oversight is placing the piece in a room with poor lighting, or using a frame that washes out the shadows. Another mistake is not considering whether the piece will be backlit or front-lit. The entire experience of the craft changes based on light.
What to check before you commit: Decide early if you want a shadow box with an LED strip behind the paper (backlight) or a frame that uses ambient room light (front-light). Backlighting highlights cutouts and creates a glowing effect—perfect for snowflakes or starry scenes. But it requires that your paper is somewhat translucent and that your frame allows for LED placement. If you are using a traditional frame without backlight, ensure the background paper is a contrasting color (e.g., dark blue for white papercuts) so the layers pop. Test the display setup with a prototype before final assembly.
Neglecting Tool Maintenance and Clean Cuts
Whether you cut by hand or with a machine, dull blades create frayed edges. Many hobbyists keep using the same blade until it refuses to cut, not realizing that the torn fibers show up prominently in a layered piece, especially on dark paper. For hand cutting, a scalpel or craft knife needs a fresh blade for each major project—they cost pennies and save headaches. For machines, change blades according to use; some need replacing after cutting a few sheets of dense cardstock.
Also consider: Use a cutting mat that is not worn out. A mat with deep grooves can cause the paper to shift, ruining alignment. Rotate your mat or replace it when you see inconsistent cuts.
Failing to Verify Template Quality Before Buying or Downloading
Many crafters download free templates from random sites without checking reviews, resolution, or instructions. The result: layers that do not match, confusing numbers, missing cut lines, or designs that look great on screen but are impossible to assemble. This wastes time and material.
Better habit: Before you commit, look at previews that show each layer. Check if the seller or creator provides a test file or at least a clear photo of the assembled piece. Read comments from other buyers. If the template is free, see if the creator has a blog post or video tutorial showing the build process. A good template should include layer numbers, cut order suggestions, and sometimes even placement guides for spacers. Be wary of designs labeled “3D” that are simply flat silhouettes stacked—true 3D papercuts have intentional depth and often include background, midground, and foreground elements.
Rushing the Assembly Process
Even if your cuts are perfect, rushing the stacking phase can ruin everything. Watching people glue layers while wet, using too much adhesive, or not giving pressure time to bond leads to shifting paper, glue marks, and delamination later. I have seen beautiful projects collapse because the crafter did not let the spacers adhere fully before moving on.
Recommended workflow: Lay out all cut layers in order. Work in a clean, dry area. Apply adhesive (double-sided tape or glue dots for larger areas, foam tape for spacing) carefully, following the template guidelines. Press firmly for 10–20 seconds per spacer. Let each layer set before adding the next. If using liquid glue, use a tiny amount and allow it to dry completely—avoid wet glue on visible edges. Finally, before placing the whole assembly into a frame, let it rest flat for an hour so the adhesive fully cures.
What to Check Before You Start Your 3D Merry Christmas Craft Papercut
- Your workspace: Clean, well-lit, with room to lay out all pieces.
- Paper type and color: Does it contrast well with your background? Is it the right weight?
- Tools: Fresh blade, clean cutting mat, tweezers for tiny pieces, bone folder for creasing if needed.
- Template instructions: Are they clear? Do they include layer numbers and spacer positions?
- Frame or display box: Measure inner depth to ensure your stacked layers fit without pressing against the glass.
- Time: Estimate how long you need. A 5-layer piece can take 1–2 hours for cutting and another 30–60 minutes for assembly. Do not rush.
Making the Right Choice for Your Project
The world of 3D papercutting is rich with possibilities. Whether you are a hobbyist creating a cozy decoration for your own home, a small business owner looking to sell handmade ornaments, or a teacher wanting a classroom activity, the principles remain the same: select a design that matches your skill, use proper materials, and take your time. The 3D Merry Christmas Craft Papercut approach rewards patience and precision. By avoiding these common pitfalls, you will produce something that looks professional and brings the joy of the season to everyone who sees it.
One final thought: do not be afraid to customize. A template is a starting point. Change colors, combine elements from different designs, or add your own details like glitter or tiny LED lights. The best projects are the ones that reflect a bit of your personality. With the right preparation, you can turn a simple stack of paper into a dimensional holiday masterpiece.