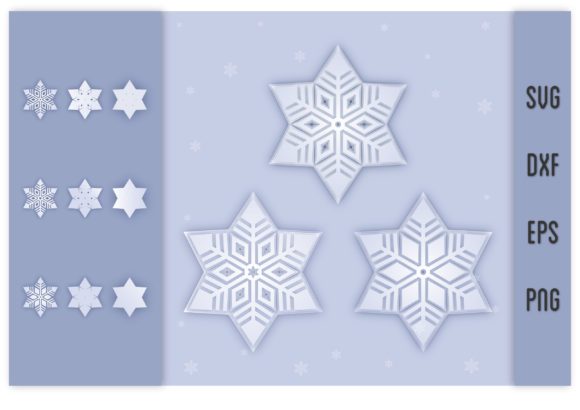
How to Create a 3D Layered Snowflake Cricut Design for Efficient Holiday Crafting
Seasonal decorating and gift-making often demand a balance between originality and efficiency. A 3D layered snowflake Cricut design offers precisely that — a structured, repeatable approach to producing dimensional paper ornaments that look intricate but follow a logical build process. Whether you are a small business owner preparing for holiday markets, a blogger creating DIY content, or a hobbyist streamlining your winter projects, understanding how this design works within a broader production workflow can save time, reduce waste, and deliver consistent results.
Unlike flat paper cutouts, a 3D layered snowflake uses multiple cut pieces stacked or interlocked to create depth and shadow. Each layer is precisely aligned, and the final assembly yields a sculptural piece that catches light from different angles. The Cricut machine handles the precision cutting; you handle the planning, assembly, and finishing. This article walks through the practical realities of working with these designs — from file preparation to final display — so you can integrate them smoothly into your existing routines.
Understanding the 3D Layered Snowflake Structure
A 3D layered snowflake is not a single cut file but a system of nested components. Typically, the design includes a backplate, several intermediate layers of decreasing or varying size, and a top detail layer. Each layer is cut from cardstock or paper of different colors or finishes, and when stacked with foam adhesive or spacers, the layers lift away from each other creating a three-dimensional effect.
From a planning standpoint, the key variables are the number of layers, the thickness of the material, and the spacing between layers. Most commercial or user-made Cricut design files for 3D snowflakes range from three to seven layers. Heavier cardstock (80 lb to 110 lb) holds its shape better and allows for taller spacers, while lighter paper works for delicate top details. The Cricut Maker or Explore series can cut these materials cleanly, provided you use the correct blade and mat settings.
Where this design fits into a workflow depends on your output goals. If you are producing a single decoration for your home, the process is straightforward: download or create the SVG file, load your mats, cut, and assemble. If you are scaling up for a craft fair or multiple gift sets, you will need to factor in batch cutting, material inventory, assembly line organization, and quality checks at each stacking step.
Tools, Materials, and File Considerations
Before you cut a single sheet, a few decisions will determine how smoothly the rest of the process runs.
Design Files and Software
You can find 3D layered snowflake SVG files on popular design marketplaces, or you can create your own in vector software like Adobe Illustrator or Inkscape and import them into Cricut Design Space. When selecting or designing a file, pay attention to layer alignment marks. Some designs include registration guides or cut lines that help you stack pieces accurately after cutting. Files with clear labels for each layer (Layer 1, Layer 2, etc.) reduce confusion during assembly, especially if you are working with multiple color variations.
If you are a small business owner or content creator, consider building a small library of snowflake templates in different sizes and styles. A single 3D layered snowflake Cricut design can be scaled up or down in Design Space, but very small layers (under 3 inches) may lose detail and become hard to assemble. Test-cut a single sheet before committing to a large run.
Materials
- Cardstock: 80 lb to 110 lb works best. Lighter paper lacks rigidity; heavier paper may require a deep-cut blade or multiple passes.
- Adhesive spacers: Foam squares, foam tape, or 3D mounting dots create the gap between layers. Thickness options range from 1 mm to 3 mm. Thicker spacers produce more dramatic depth but may require stronger adhesive to stay fixed.
- Mat: Use a LightGrip or StandardGrip mat depending on paper weight. A tacky mat ensures small cut pieces like snowflake arms stay in place.
- Bonding adhesive: Tacky glue, liquid glue with a fine tip, or glue pens for smaller pieces. Avoid wet glue that may warp thin paper.
Cut Settings and Preparation
In Cricut Design Space, set the material type to match your cardstock weight. Run a small test cut to verify the blade pressure and depth. Snowflake designs often have thin connecting bridges and delicate interior cuts; if the blade is too aggressive, those bridges may tear. Reduce pressure slightly or use the "less pressure" setting for intricate designs. After cutting, remove the pieces from the mat slowly and use a weeding tool to lift small internal shapes.
Assembly Workflow: From Cut Pieces to Finished Ornament
Assembly is where the 3D layered snowflake Cricut design truly comes alive, and it is also where most mistakes happen. A structured assembly process keeps the work consistent and frustration low.
- Sort and label layers immediately after cutting. Place each layer into a separate container or grid tray. If you are making multiple snowflakes at once, keep matched sets together. Labeling each set with a sticky note or masking tape piece saves time later.
- Dry-fit the layers before applying adhesive. Lay the backplate flat, then place each subsequent layer on top without glue. This lets you verify alignment, check that all pieces fit correctly, and confirm the visual progression of sizes and colors.
- Apply spacers to the back of each layer. For layers that sit above the backplate, attach foam squares to the underside of the layer rather than to the base. This gives you more control over placement. For layers with small arms or narrow sections, cut foam squares into smaller pieces to avoid adhesive showing from the front.
- Stack from back to front. Start with the backplate, then press the next layer onto it, aligning with the edges or registration marks. Work your way forward one layer at a time. Allow each layer to set for a few seconds before adding the next.
- Add hanging hardware. If the snowflake will hang, attach a loop of clear fishing line, twine, or thin ribbon to the backplate before attaching the second layer. This hides the attachment point and keeps the front clean.
- Press and let cure. Once fully stacked, place the snowflake under a light book or flat weight for 15–30 minutes. This ensures all adhesive layers bond evenly and prevents delamination later.
For batch production — say, 20 snowflakes for a wedding backdrop or holiday market — set up an assembly line with one person cutting, one sorting, and one assembling. This reduces handling errors and speeds throughput. Keep a reference snowflake on hand to check alignment and spacing against.
Practical Use Cases and Integration Points
A 3D layered snowflake Cricut design is not limited to tree decorations. Its real value lies in how it can be adapted to different contexts.
Seasonal Product Lines for Small Business Owners
If you sell handmade goods, these snowflakes can become a core product or an add-on item. Assemble them as standalone ornaments, attach them to gift tags, or mount them on card bases for holiday cards. The 3D effect photographs well for online listings, and the layered construction gives customers a tangible sense of quality. Price them based on material cost, assembly time, and the number of layers. A five-layer design using metallic or pearl cardstock can command a higher price than a simple three-layer version.
Content Creation for Bloggers and Educators
For those producing tutorials or project guides, the 3D layered snowflake Cricut design makes for compelling step-by-step content. You can film or photograph each stage — file setup, cutting, sorting, stacking — and explain the reasoning behind material choices and spacer thickness. Educators can use the project to teach students about symmetry, layering, and geometric design. Because the design is repeatable, it works well for classroom settings where each student needs identical materials.
Event and Window Decorations for Businesses or Venues
Coffee shops, retail stores, and event spaces often need large-scale seasonal decorations that look professional without requiring extensive setup time. A set of 3D snowflakes in consistent colors can be hung from ceilings, taped to windows, or arranged on walls. Since they are lightweight, they can be affixed with removable adhesive dots. If you produce them in bulk, you can offer a decoration package service to local businesses, handling everything from cutting to installation.
Personal Gift-Giving and Home Use
For personal projects, these snowflakes can be personalized with names, dates, or family initials added to the top layer in Cricut Design Space. They also work well as gift toppers for winter presents, replacing standard bows with a keepsake that recipients can reuse. If you have leftover cardstock from other projects, these designs are an excellent way to use partial sheets efficiently.
Quality Control, Consistency, and Long-Term Use
One of the overlooked aspects of working with layered paper designs is how they hold up over time. Cardstock snowflakes are naturally fragile, but you can extend their lifespan with a few practices.
- Store flat or in protective sleeves. If you produce snowflakes ahead of a sale or event, store them in clear cellophane bags or between sheets of acid-free tissue paper. Stacking heavy items on top can crush the layers.
- Use UV-resistant materials. If the snowflake will hang in a sunny window, choose cardstock that resists fading. Some metallic or coated papers hold color longer than standard dyed cardstock.
- Reinforce weak joints. For designs with very thin connection points, apply a tiny dab of clear-drying glue to the back of the joint after assembly. This adds strength without affecting the front appearance.
- Create a master reference file. Once you finalize a 3D layered snowflake Cricut design that works well, save it in a dedicated folder with notes on material types, spacer thickness, and cut settings. This makes future production runs consistent and eliminates guesswork.
From a workflow perspective, the real efficiency gain comes from standardizing your design and assembly process. If you produce the same snowflake design year after year, you can prep materials, cut times, and assembly methods will become faster. Over time, you may even optimize the file to reduce cut time — for example, nesting pieces more tightly on the mat or merging layers where possible.
Final Observations on Integration
A 3D layered snowflake Cricut design is more than a seasonal craft project. It is a repeatable, scalable system that fits into creative production workflows, small business operations, content creation, and personal decoration. The key to getting the most out of it lies not in the cutting itself but in how you plan for material selection, assembly order, and quality control. By treating the snowflake as a structured process rather than a single cut, you can produce consistent results with minimal waste and maximum visual impact.
Whether you are fulfilling a bulk order, teaching a class, or simply decorating your own space, the same principles apply: prepare your files carefully, sort your pieces immediately, assemble with patience, and store finished items properly. The result is a professional-looking decoration that feels substantial and carefully made — exactly the kind of work that stands out in a crowded market or brings genuine joy to a home.